
Last updated November 18, 2026
Spray Foam Insulation Warning Signs Every Homeowner Should Know
Most spray foam failures announce themselves in numbers, not in foam. Long before you see a gap or a stain, the house tells you something changed: a winter gas bill that jumps 18% with no rate hike, a smart thermostat logging two extra HVAC runtime hours a day, an indoor humidity reading that drifts up two points and stays there. In our experience across North Las Vegas, the homeowners who catch failing foam early are the ones watching those figures, not the ones climbing into the attic with a flashlight. This guide shows you which numbers to track, what the visible signs look like once they appear, and exactly what a proper diagnostic should hand you when it’s done.
Quick Answer
Spray foam insulation is failing when your building envelope starts losing more air than it used to, your indoor humidity climbs above its normal baseline, or you can see or feel the foam pulling away from framing, turning brittle, or discoloring. The earliest and most reliable signal is a rising ACH50 (air changes per hour at 50 pascals) on a repeat blower-door test, followed by longer HVAC runtimes and higher utility bills. Visible defects like shrinkage gaps, delamination, and off-ratio cure usually show up after the performance data has already moved.
Table of Contents
- The Data Signals That Move Before the Foam Does
- Reading Your ACH50: The One Number That Matters Most
- Visible Failure Modes: Shrinkage, Delamination, and Off-Ratio Cure
- Why Failing Foam in an Unvented Attic Turns Into Roof-Deck Condensation
- Rim Joist Warning Signs: Pests, Staining, and Efflorescence
- What a Professional Diagnostic Should Produce
- Patch Repair vs. Section Replacement: Cost Differences
The Data Signals That Move Before the Foam Does
Foam fails from the inside out. The chemical structure changes, the bond to the framing weakens, and the building’s air and moisture behavior shifts. All of that happens before a defect becomes large enough to spot from six feet away. Here are the three data streams we ask North Las Vegas homeowners to pull before we ever schedule a visit.
- Utility bills up more than 15% year-over-year with no rate change. A rate increase shows up on the supply portion of the bill with a new per-kWh figure. If your rate is flat and your usage climbed double digits in a heating or cooling season, the envelope changed, and foam is a prime suspect.
- HVAC runtime up more than 20% on a smart thermostat. Nest, Ecobee, and Honeywell all log runtime hours by day, week, and month. Pull the same month year-over-year. Two extra hours a day in a house that used to run eight is the kind of drift that points straight at air leakage.
- Indoor humidity climbing 5% or more above its seasonal baseline. A hygrometer in the living space is enough. If your summer indoor RH used to sit at 45% and now reads 52% with the same AC settings, moisture is getting in somewhere that used to be sealed.
None of those three signals is proof on its own. Together, they warrant a blower-door test and a thermal scan. In North Las Vegas, where summer design temps hit 110°F and the delta between indoor and outdoor air is brutal, a foam failure at a thermal bridge shows up in the runtime data faster than it would in a mild climate. We’ve seen June runtime numbers double on homes where the only thing that changed was the bond between foam and top plate.
Reading Your ACH50: The One Number That Matters Most
ACH50 is air changes per hour at 50 pascals of pressure. A blower-door test – a calibrated fan mounted in an exterior doorway that pressurizes the house to 50 pascals and measures how much air escapes – produces this figure. It’s the single most useful number you can have on a home, because it takes the entire envelope and reduces it to one benchmark you can track over time.
If foam was installed and a blower-door test was performed, the contractor should have given you the before-and-after readings in CFM50 (cubic feet per minute at 50 pascals) or ACH50. That reading is your baseline. A re-test two to five years later tells you whether the assembly is holding. If your ACH50 has increased by roughly 15% or more against that baseline, the foam is no longer performing the way it did on day one, and it’s worth a thermal scan to find where the loss is happening.
What we’ve learned in North Las Vegas is that older homes in neighborhoods like Aliante and Eldorado, where the attic floor often had loose-fill before foam was added over it, produce the most misleading ACH50 numbers if the air sealing wasn’t done first. Blowing foam over an unsealed attic floor traps air in the wrong places. This is why Envelope Insulation North Las Vegas home service always starts with air sealing before any insulation goes down. A clean baseline matters more than a fast install.
If you’ve never had a blower-door test, get one. The number is worth having on file the way you keep a home inspection report, and it’s the only way to catch a foam failure on the data curve.
Visible Failure Modes: Shrinkage, Delamination, and Off-Ratio Cure
Eventually the foam gives you something to look at. Each failure mode has a signature. Knowing which one you’re seeing tells you how bad the problem is and how much of the assembly needs work.
Shrinkage
Shrinkage shows up as a uniform gap around the perimeter of the foam where it meets the framing. Foam that was applied correctly bonds to the wood and stays bonded. Foam that shrinks away leaves a consistent 1/16″ to 1/8″ gap along the edges of studs, rafters, or top plates. The gap itself is small, but it’s the equivalent of a continuous slot vent running around the entire assembly. In North Las Vegas, we see shrinkage concentrated on west- and south-facing roof decks where attic temperatures routinely exceed 150°F in July and August. Heat cycling drives the shrink.
Delamination
Delamination is the foam edge lifting or separating from the substrate. You’ll find it by pressing along the perimeter with a screwdriver handle or knuckle. A bonded edge is solid. A delaminating edge flexes, gaps, or peels back with light pressure. Delamination usually starts at transitions – where foam meets drywall, poly vapor barriers, or older lumber that was dirty or wet when the foam went in. Once one section starts lifting, the adjacent foam loses its mechanical anchor and pulls away too.
Off-Ratio Cure
Off-ratio cure means the two components didn’t mix in the correct ratio during application. The result is a foam that looks wrong: yellow-brown discoloration, a brittle surface, a texture that crumbles when you press it with your thumb. Properly cured closed-cell foam is hard, dense, and slightly tacky on the surface; it doesn’t flake. Off-ratio foam also feels softer than it should and often has a chemical smell that lingers long after the install. If you find a section that crumbles, do not attempt to remove it yourself. The dust is a respiratory irritant. Document what you see and call a professional for assessment.
Any of these three signs warrants a diagnostic. If the visible defect is confined to one bay or one transition, it’s often worth reading the foam performance data first to see if the assembly is failing broadly or locally. Our Spray Foam Insulation in North Las Vegas page covers the correct installation sequence, which is the best defense against all three failure modes.
Why Failing Foam in an Unvented Attic Turns Into Roof-Deck Condensation
In an unvented attic, the spray foam on the underside of the roof deck is the moisture control layer. It’s the only thing standing between the conditioned air below and the sheathing above. When it’s intact, that’s fine. When it starts failing, moisture finds the deck.
The mechanism is straightforward. Warm, humid air from the living space rises, finds its way through the shrinkage gaps and delamination edges, and contacts the cold roof sheathing. In North Las Vegas, the contrast is extreme: outdoor nighttime temps in winter can drop into the 30s while the interior holds at 68°F and 40% RH, and a winter morning is enough to drive condensation on sheathing that was never designed to see it. Condensation on the deck leads to staining, then to mold growth on the wood, then to rot. By the time you can smell it, the deck is compromised.
Here’s what to look for if you can safely view the deck from the attic hatch without climbing:
- Dark staining on the underside of the roof sheathing, especially near the ridge and along the north-facing slope.
- White or gray fuzzy growth on the wood between the rafters.
- Frost on the sheathing during cold snaps.
- Damp or soft spots at plywood seams.
If you see any of those, that’s an emergency-grade moisture problem, not a cosmetic issue. Call a professional. Roof-deck rot from foam failure is one of the most expensive repairs in a home, and the fastest way to stop it is to catch it early. In homes we’ve evaluated across North Las Vegas, the pattern is consistent: moisture shows up within 12 to 24 months of a shrinkage failure becoming visible, not the other way around.
Rim Joist Warning Signs: Pests, Staining, and Efflorescence
Rim joists – the framing band around the perimeter of the floor system where it meets the foundation – are one of the most common places spray foam gets applied and one of the most common places it fails. That’s true in North Las Vegas for a specific reason: the desert soil temperature swings and the rim joist sits at the thermal boundary between the foundation and the exterior wall. The foam-to-block bond gets worked hard by expansion and contraction, and once it fails, the assembly opens wide.
Three warning signs deserve particular attention:
- Pest entry evidence. Spray foam is not pest-proof. Rodents, insects, and especially the roof rats common across the valley will find and enlarge gaps at delaminated foam edges. Look for droppings, gnaw marks, grease rubs along framing, and small openings in the foam itself. Any of those means the foam has already given up enough surface to admit them.
- Moisture staining on adjacent wood. Dark staining on the rim joist, sill plate, or the first interior stud means water is reaching wood that foam was supposed to protect. It’s often the earliest visible sign that the bond has failed.
- Efflorescence on block foundation walls. White, chalky deposits on the masonry inside the crawl space or basement mean water is moving through the block. If the foam is still bonded to the block, water shouldn’t be reaching that surface. Efflorescence on a foamed block wall is direct evidence the foam-to-block bond failed, and crawling under it to check is not a job for a homeowner. Call a professional.
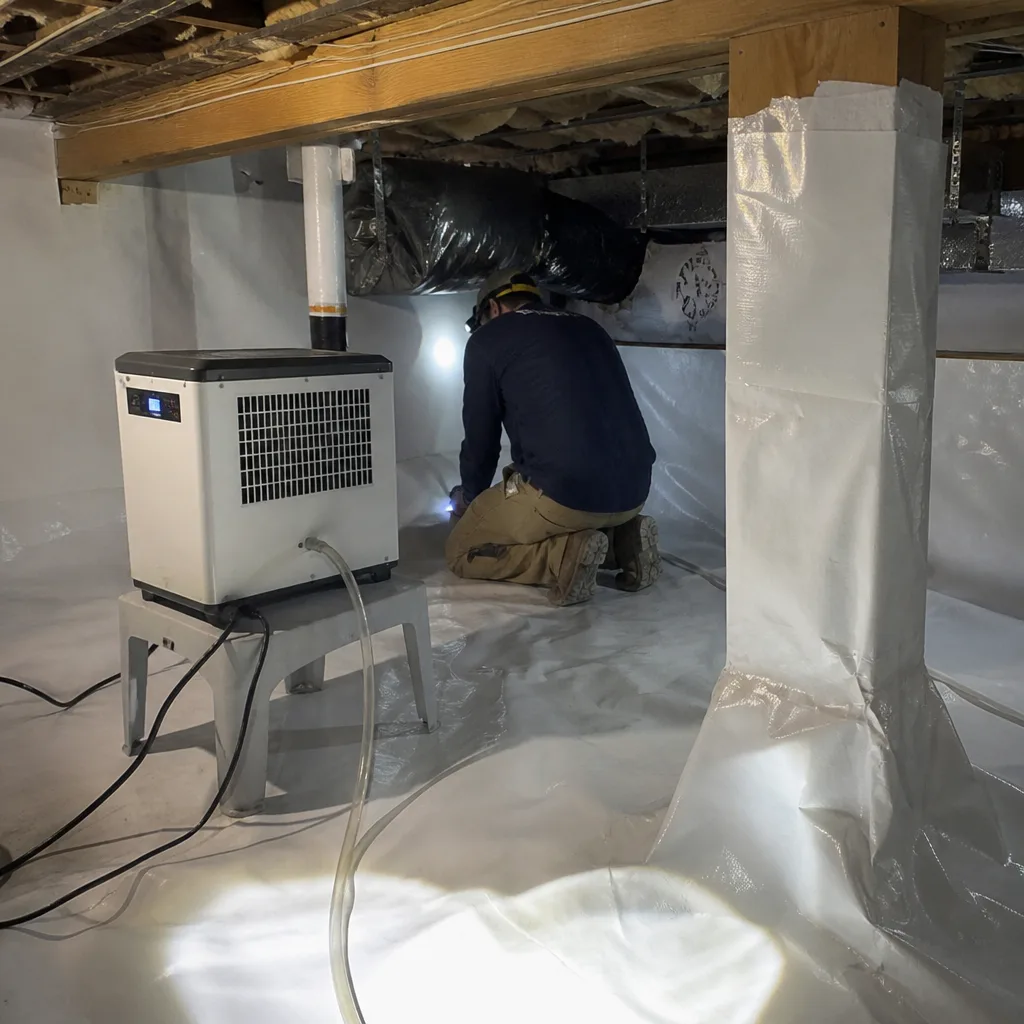
If the rim joist foam is failing, the crawl space is usually next. This is why we treat Crawl Space Encapsulation & Vapor Barrier in North Las Vegas as a package with any rim joist work – foam alone doesn’t solve the moisture movement. The vapor barrier and the foam have to perform together.
What a Professional Diagnostic Should Produce
A proper diagnostic on a suspected foam failure produces three deliverables. If a contractor shows up, looks at the attic, and gives you a verbal assessment without all three, that’s a red flag.
- A blower-door number. Before any repair work, a blower-door test establishes the current ACH50 or CFM50 of the house. This gives you a starting figure to compare against your original post-install reading. After the repair, a second test quantifies how much of the envelope loss was recovered. If a contractor can’t or won’t run a blower door, they can’t prove the repair worked.
- A thermal imaging scan of the failed assembly. Infrared imaging shows temperature differentials across the assembly. A failing section of foam reads warmer than surrounding sections in summer and colder in winter. The scan identifies the actual footprint of the failure, which determines whether a patch will fix it or whether the whole section needs replacement.
- A written scope distinguishing patch repair from section replacement, with cost implications for both. You should leave with a document that names each failed area, states whether patch or replacement is recommended, and shows the price for each route. Written scope before work starts, always. This is Haven Standard Clause 1 at work, and it’s the reason our homeowners can compare bids from Attic Insulation in North Las Vegas contractors side by side.
On every job where it applies, our team publishes before-and-after blower-door numbers so the homeowner can see the performance change in a single figure. That’s the standard a diagnostic should meet.
Patch Repair vs. Section Replacement: Cost Differences
Patch repair is a targeted fix. The failed section is cut back, the substrate is cleaned, and new foam is applied over the affected area. Patch repair works when the failure is confined to one bay or one transition and the surrounding foam is bonded and sound. Costs run lower because labor is limited to the affected area.
Section replacement is the correct route when failure is broad – when delamination has started along multiple rafter bays, when off-ratio foam covers an entire attic plane, or when the moisture damage behind the foam requires deck repair. Section replacement means removing the failed foam, addressing any moisture damage, re-sealing the substrate, and re-applying in the full affected zone. Costs are higher, but a patch over a broadly failing assembly will fail again.
- Patch repair is typically less expensive and faster. It’s the right call for a single localized shrinkage gap or one delaminated rim joist bay.
- Section replacement is more expensive but necessary when the failure footprint exceeds a single bay, when moisture damage is present, or when the underlying substrate was compromised at install.
- Full re-application is rare but sometimes the only correct answer on an off-ratio install where the entire applied area is suspect.
One trade note worth knowing: materials matter less than sequence. Whether the original install used Johns Manville, Knauf, Rockwool, or CertainTeed, the failure points are the same – bad substrate prep, unsealed substrate, or application at the wrong ratio. Our approach is to name the materials in the written scope so you know what’s being installed on the repair, and to seal all air leaks before any new foam is applied.
Common Mistakes to Avoid
- Assuming rising bills are “just inflation.” A rate increase is printed on your bill. A 15%+ usage increase is not. Pull the year-over-year usage table before accepting a higher bill as the new normal. North Las Vegas ratepayers often have all the data they need to spot a foam failure on the electric bill alone.
- Testing indoor humidity with a single $10 gauge. Cheap hygrometers drift and read low. A $30 calibrated unit in the living space and another in the attic gives you a usable baseline. Without one, you can’t catch a 5% humidity climb until it becomes a 15% one.
- Skipping the blower-door test and going straight to a visual inspection. Foam that looks fine can be failing. Foam that looks questionable can be holding. The blower-door number is the only way to know.
- Letting a contractor patch a failure without addressing the original cause. Foam that shrank because the substrate was wet will shrink again. Foam that delaminated because the substrate was dirty will delaminate again. If the written scope doesn’t name the cause, you’re paying for a repeat visit.
- Confusing air sealing with insulation. In a North Las Vegas attic, foam over an unsealed top plate is just a smoother way to trap air. Seal the top plates, can lights, and penetrations first, then insulate. Our teams will not blow insulation over an unsealed attic floor, and any contractor who will is a contractor to be cautious with.
- Ignoring efflorescence on block walls. White chalky deposits on the inside of a block foundation are not normal. They mean water is moving through the masonry, which means the interior bond is failing somewhere. Get an inspection before winter.
- Treating spray foam as pest-proof. It isn’t. Any gap at a foam edge is an open door as far as rodents are concerned. If you’ve had pest activity near foamed framing, that’s your first clue the foam has failed.
When to Call a Professional
Call a professional when any of the following is true: your usage-driven utility bills are up more than 15% year-over-year, your thermostat runtime is up more than 20% against the same month last year, or you can see or feel a foam defect with your own eyes. Call immediately if you see condensation or dark staining on the roof deck, if there’s efflorescence on foamed block walls, or if pest evidence appears at a foamed rim joist. Do not attempt to remove failing foam yourself – the dust from failed closed-cell foam is an irritant, the edges of a delaminated section can cut, and if a spray rig was involved, the cure chemistry matters. A trained technician should assess the failure. Envelope Insulation North Las Vegas offers free estimates in North Las Vegas. Call (833) 630-4008.
Frequently Asked Questions
The earliest reliable signal is a rising ACH50 on a repeat blower-door test, followed by longer HVAC runtimes on a smart thermostat and a bump in indoor humidity. Visible signs – shrinkage gaps, delamination, or off-ratio discoloration – usually show up after the data has already moved. If you don’t have a baseline blower-door number, get one first; it’s the only figure that can prove a failure later. Call us for a free estimate that includes a blower-door reading.
It looks like a consistent 1/16″ to 1/8″ gap running the length of a stud, rafter, or top plate where the foam edge meets the wood. The gap is uniform, not random, and it’s usually worse on west- and south-facing roof decks in North Las Vegas because attic temps in July and August routinely exceed 150°F. Any gap you can slip a business card into is worth a diagnostic. Call (833) 630-4008 for a thermal scan.
Yes – in an unvented attic, closed-cell spray foam on the roof deck acts as the primary moisture control layer for the assembly. When it fails, warm humid air gets past the gaps and condenses on the cold sheathing. That’s why a shrinkage or delamination issue in this assembly is more urgent than the same issue in a vented attic. If you see staining or frost on the deck, call a professional before the next heating season.
It depends on how much of the assembly was affected. Off-ratio foam that’s confined to one bay or one transition can often be removed and replaced locally. Off-ratio foam that covers an entire attic plane typically requires full removal and re-application. A thermal scan and a written scope will establish which route you’re looking at before anyone starts work. Call us for a free estimate to scope the removal.
That’s efflorescence, and it means water is moving through the block. If the foam was still bonded to the block, that surface would be dry. Efflorescence on a foamed block wall is direct evidence the foam-to-block bond has failed. Don’t crawl under it yourself – get a professional assessment and a written scope for both the foam repair and the crawl space moisture issue. Call (833) 630-4008.
The best proof is the paperwork: a written scope from before the install, photos of the sealed substrate before foam was applied, and before-and-after blower-door readings. If you have none of those, a current blower-door test with a thermal scan establishes where the assembly actually stands today. Our team hands over a Documented Photo Record and, where applicable, before-and-after blower-door numbers on every job. Call for a free second opinion on any written estimate you already have.
The Bottom Line
Failing spray foam almost always shows up first as a change in the house’s numbers – a 15% bill jump, a 20% runtime increase, a 5% humidity rise – and only later as a visible defect. The three visible failure modes (shrinkage, delamination, off-ratio cure) each have a signature you can read once you know what you’re looking for. Unvented attic assemblies are the most urgent because the foam is the moisture control layer; rim joist failures are the most overlooked because the evidence hides in the crawl space. Catch the data signal, and you catch the failure while it’s still a patch job. Under The Haven Standard, every job we perform starts with a written price and ends with a documented record – call (833) 630-4008 for a free estimate and a blower-door reading that shows where the assembly stands today.
Written by the team at Envelope Insulation North Las Vegas.